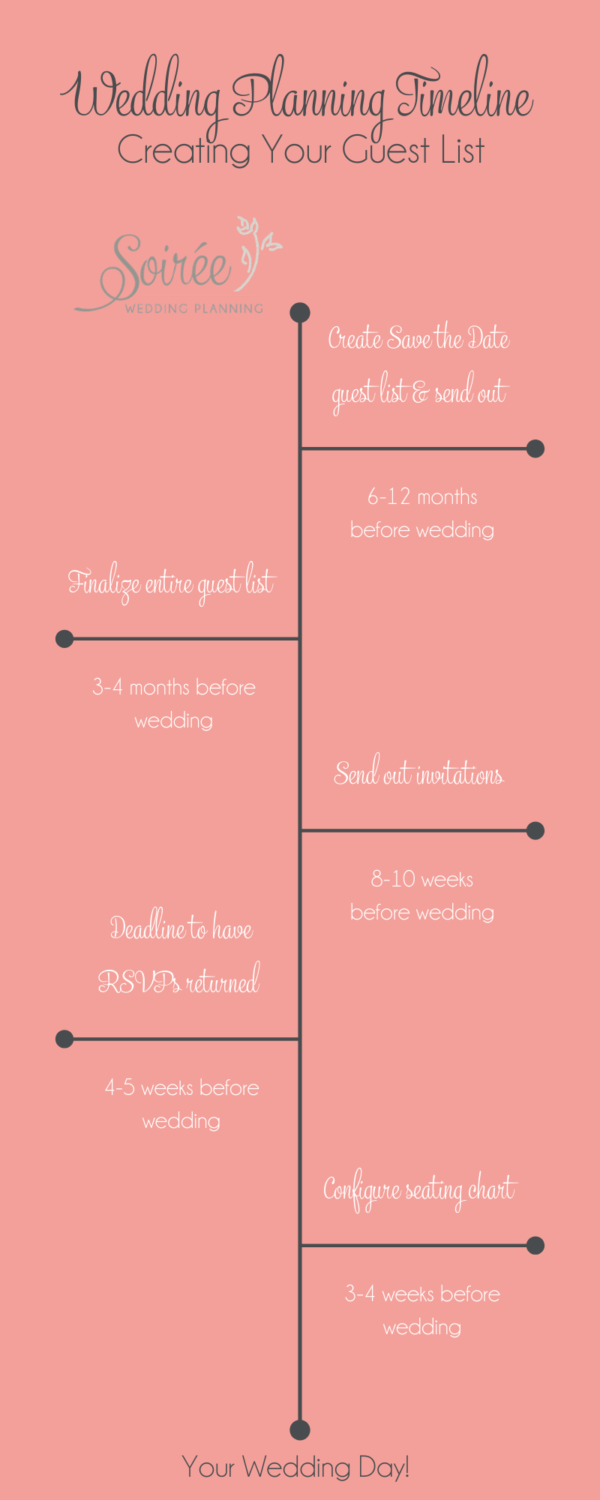
Soirée’s Guide To: Creating Your Guest List & Seating Chart
Putting together a guest list can seem like such a daunting task, and even more, figuring out a seating chart may be overwhelming. But we’re here to remind you that it’s important to take the whole process step-by-step and we’ll break it all down for you!
***
1. Create an initial guest list
The first thing we suggest you do is create a guest list based on the number of households you will be inviting. Don’t worry about the number of individuals, just worry about the number of households that you’ll be inviting.
2. Send Save the Dates
Once you’ve compiled a guest list based on the number of households, the next thing to tackle is Save the Dates. You’ll want to send Save the Dates anytime between 6 and 12 months out from your wedding date. Send them to the guests that you consider close family and friends. These are going to be the people that are going to be there for you no matter what when it comes to your wedding day! At this point, you don’t have to worry about whether or not those specific guests will receive a +1 or not.
Once Save the Dates are sent there may be some revisions made to your list in terms of addresses. You may get some Save the Dates returned due to someone moving that you’ll need to get that information updated and re-send the Save the Date to those guests.
3. Build out your guest list
Now that Save the Dates have been taken care of, you’ve already got a head-start on your final guest list! Around 3 months prior to your wedding day is when you need to finalize your entire guest list and really decide who is going to be invited to your wedding so that the information can be sent off to the printing company.
Before adding any more guests to the list you’ve already started, first return to the guest list used for Save the Dates and determine who will receive a +1 and who will not. Once that is completed, then it’s time to add all other guests who you want invited to the ceremony, reception, or both! Similarly to your Save the Date guest list, you’ll need to decide which of these additional guests will be receiving a +1 and who will not.
4. Send the invitations
The printing company will take a few weeks to get your order of invitations filled. Once received, you’ll send invitations out to guests 8-10 weeks prior to your wedding.
5. Manage RSVPs as they are received
If you invest in The Experience or The Everything package, your Soirée team will manage the RSVPs for you to ensure that guests are accounted for. If you invest in any other package, managing RSVPs is your responsibility. Typically, you’d want a deadline to return RSVPs 4-5 weeks prior to your wedding so that it allows you time to reach out to guests who have not returned their RSVPs by the deadline to find out whether they accept or decline your invitation.
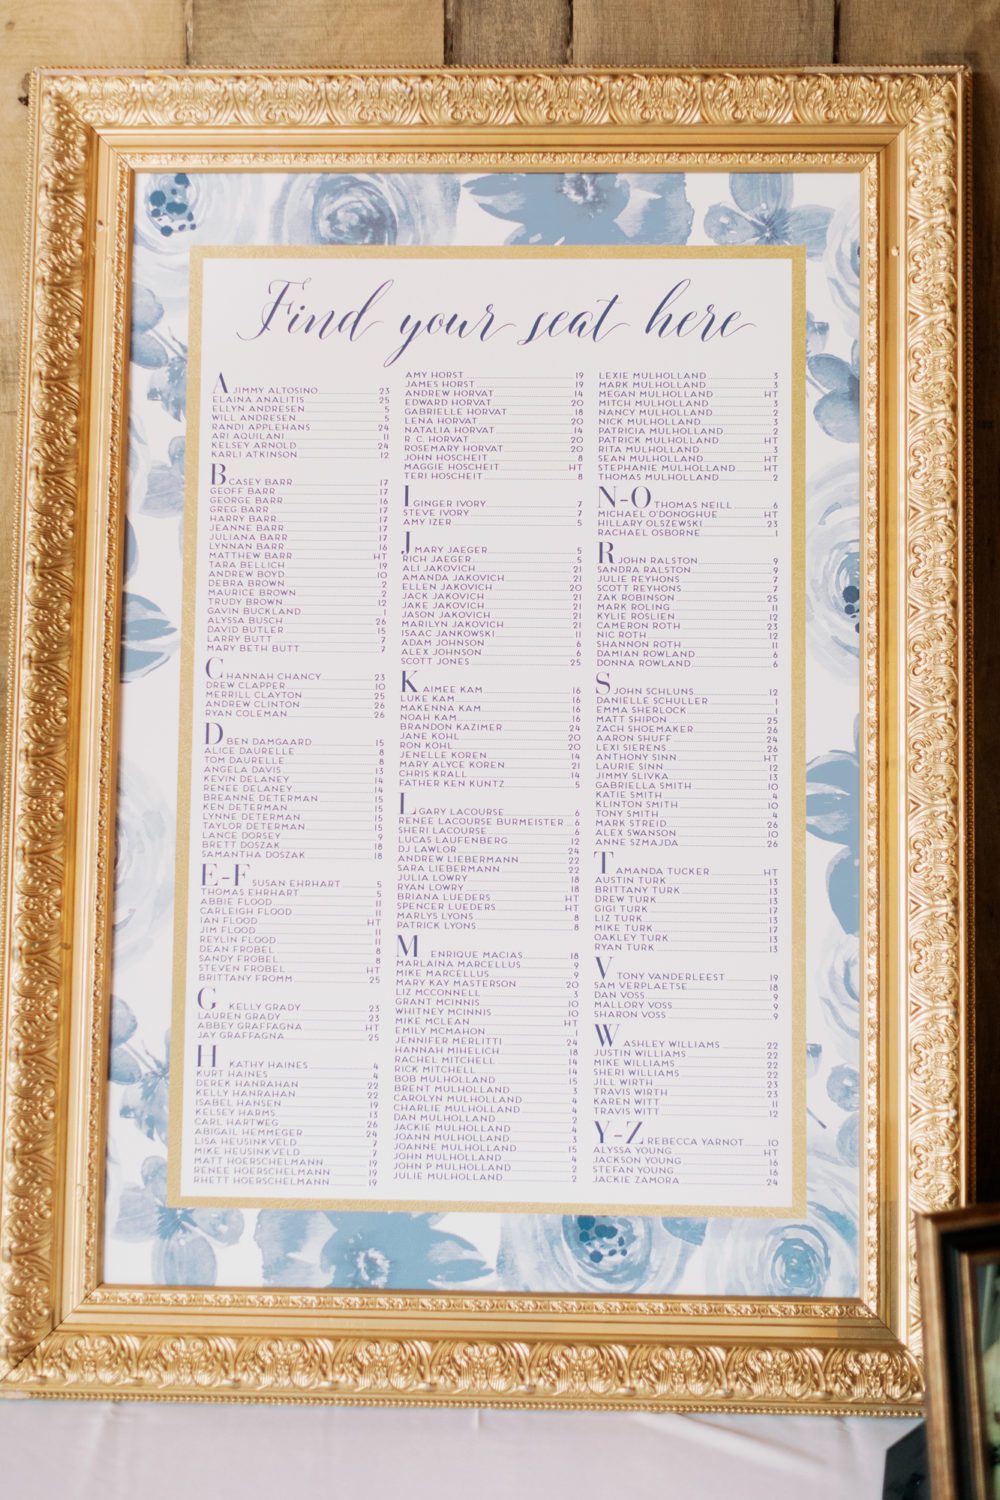
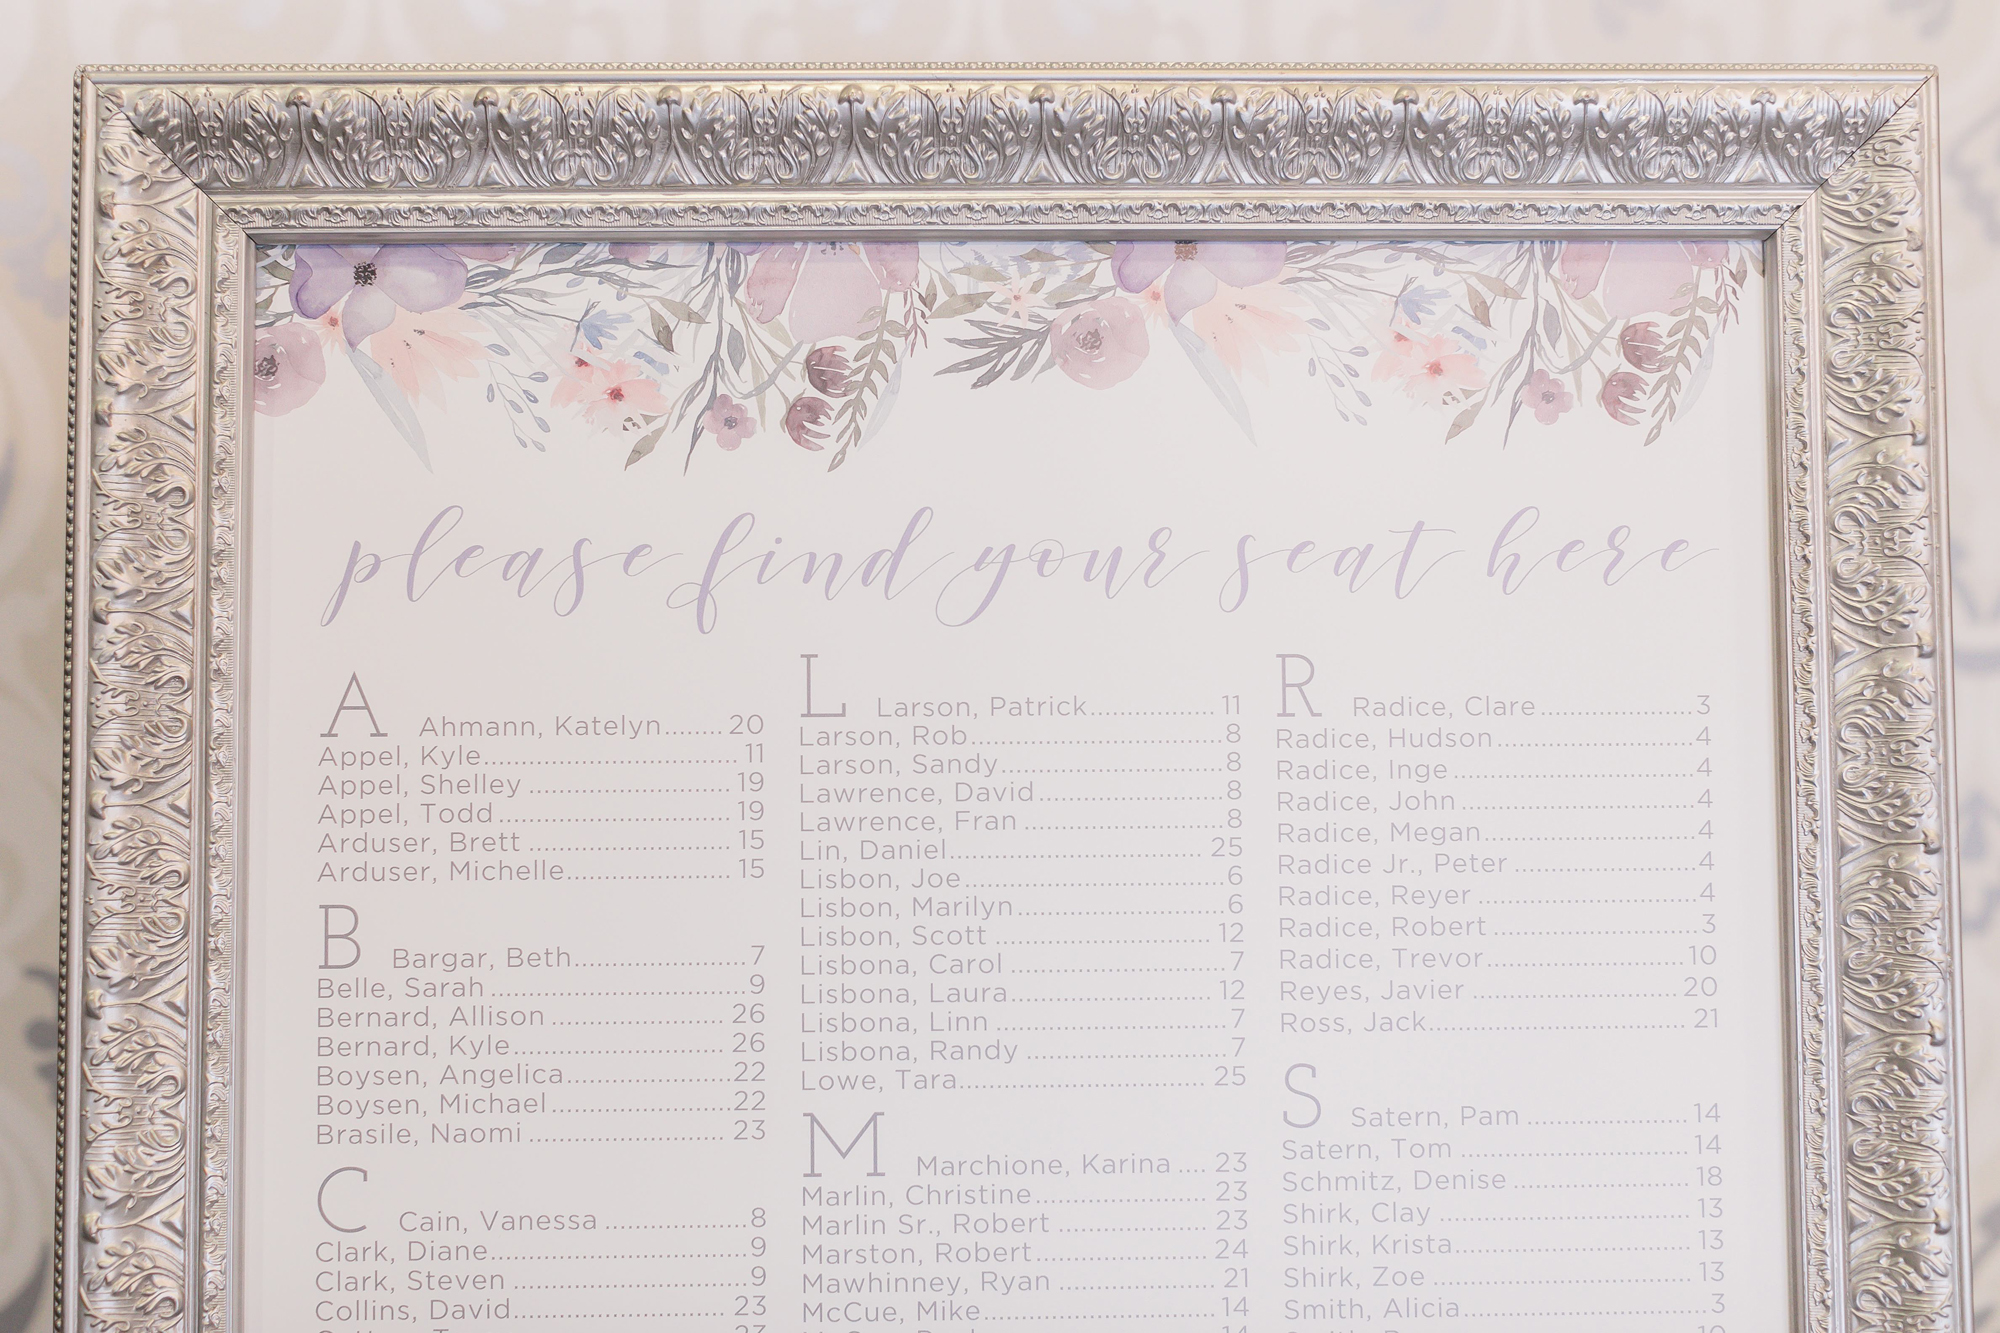
6. Determining seating chart
Once your guest list is completely finalized, you can finally start determining a seating chart layout for your reception venue! Some pieces of information needed to aid in this decision is figuring out the number of tables, chairs, and centerpieces you’ll need for your reception. We can help you create the seating chart based on your layout and unique elements of your big day.